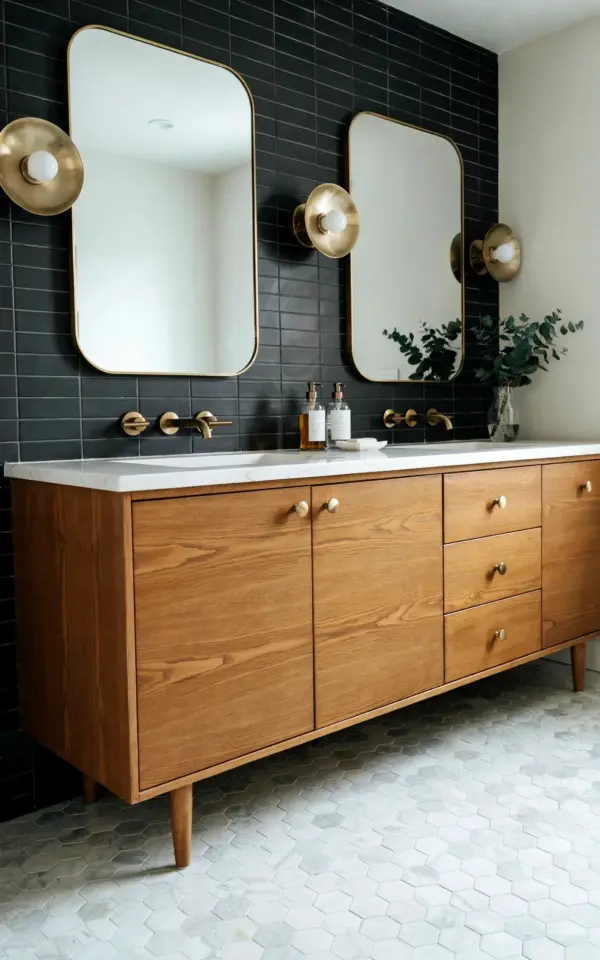
So you want an industrial bathroom that looks like it cost a fortune but didn’t actually break the bank. I just finished redoing mine and honestly, the before was so painfully basic it hurt. White walls, a boring sink, that sad plastic shower caddy. Now it’s got this raw modern edge that makes me feel like I’m staying at a boutique hotel every time I brush my teeth. Metal and wood. Black and walnut. That’s the magic combo. And the best part? I did most of it on a strict DIY budget. Here’s exactly how it went down, with real prices and real options if you’re pinching pennies too.
Starting with a blank slate: what the basic bathroom looked like
Look, I’m not gonna lie, the starting point was depressing. A beige toilet, a white laminate countertop that had seen better days, and that awful fluorescent light fixture that hums. Nothing offensive, just… nothing. A room you walk through without noticing. You know the kind. But underneath that blandness I saw potential. The floor was decent ceramic tile, a warm neutral. And the layout worked fine. So all I really needed were new finishes and a bit of character. The kind of character that cheap builder-grade bathrooms never have.
I talked to my plumber buddy and he confirmed what I’d guessed: moving the toilet or shower costs thousands. Don’t do that. Keep the footprint. Instead, swap the vanity, change the mirror, replace the faucet, and add shelving. That’s where the magic lives.
Oh and one random thing: I’m weirdly picky about how my toothbrush handle feels against metal. Weird, I know, but it’s a real problem when the shelf is too close to the sink edge. Plan your layout with your actual morning routine in mind, not just the Pinterest photo.
Choosing the walnut vanity on a budget (yes it’s real wood and not veneer)
Walnut is expensive. I know. I almost gave up on it until I found a local reclaimed wood guy who sells offcuts for next to nothing. He had this board with a beautiful grain and a small knot, maybe five feet long. $45. My dad helped me build a simple open shelf vanity base with two drawers. Total lumber cost under $100. Honestly, if you can use a circular saw and a pocket hole jig, you can do it too. But if that’s too much DIY, check online marketplaces for secondhand solid wood furniture that you can convert into a vanity. An old walnut console table works perfectly. Just cut a hole for the sink basin.
I paired it with a cheap drop-in ceramic sink from the hardware store – $35 on clearance because the box was damaged. No one cares about the box. The sink works exactly the same. And the faucet? I got a matte black one from an off-brand on Amazon for $28. Reads same as the $200 models. Still works a year later with zero drips. Don’t overspend here.
- Walnut lumber from reclaimed wood dealer: $45
- Plywood for drawer boxes and shelf: $22
- Matte black faucet (Amazon off-brand): $28
- Ceramic sink basin (clearance damaged box): $35
- Hardware (black handles): $8 total
That’s the whole vanity setup for well under $150. I had the pocket hole screws and wood glue already, but even adding those, you’re under $175. Compare that to a store-bought walnut vanity that runs $800+.
Black metal shelves: the quickest way to get an industrial bathroom feel
I wanted that raw open shelving look, you know, like the cool coffee shops have. But the pre-made ones from home stores are crazy expensive for what they are. Two small shelves plus hardware? $80. Not worth it. So I bought black iron pipe from the plumbing aisle. One-inch diameter, cut to size by the store for free. Total cost for three shelves: around $30. The flanges were the pricey part, but I found a six-pack for $18 online. The wood shelves themselves are just pine boards I stained with a dark walnut stain. Another $12. So maybe $60 all in for three industrial shelves that look like they cost triple.
Mounting them was a pain because I had to drill into tile. Use a masonry bit and go slow. And if you rent, ask your landlord first. My landlord said yes as long as I patch the holes later. Fine by me.
Here’s the thing: don’t overcrowd these shelves. Space things out. A single candle, a small plant (fake if you have no window, which I didn’t), a rolled-up hand towel. Less is more when you’re going for that hotel vibe. Otherwise it looks like a cluttered workshop.
Matte black fixtures and hardware: swapping the boring for the moody
The biggest bang for your buck in any bathroommakeover is changing the hardware. Faucets, towel bars, toilet paper holder, light fixture. I replaced the builder-grade chrome towel ring with a matte black one from the dollar store clearance shelf. Seriously. Two dollars. It’s a simple metal ring, no moving parts, it works. The light fixture above the mirror was a cheap $25 fixture from an online lighting outlet – four exposed bulbs in a bar shape. Those bulbs are the warm-tone LEDs, not the cold blue ones. Huge difference. The warm light against the walnut and black iron is exactly what gives that hotel mood.
Don’t forget the little things. The shower curtain rod. I got a black metal tension rod for $9. The curtain itself is a plain white heavy-weight one – not that cheap plastic film – and it anchors the dark hardware without making the room feel like a cave. You need some white in here.
One odd observation: the sound of the shower curtain rings sliding on a metal rod matters. The cheap chrome ones screech. The matte black ones are quieter. Maybe it’s the coating. I don’t know. But it’s a small luxury that matters at 6am.
How to pull off metal and wood style without it looking like a lumber yard
This is the tricky part. The metalwoodstyle can easily tip into ‘I just stacked some planks and pipes in a bathroom’ territory. The secret is balance. Too much wood and it feels like a sauna. Too much metal and it feels like a boiler room. I used the walnut vanity and pine shelves as the warm elements, and kept everything else dark, cool, and industrial. The black pipes, black mirror frame, black faucet. That’s it. No exposed brick needed. No concrete walls. Just those two materials in a careful ratio.
Another tip: keep the walls off-white or light gray. I painted the existing walls a soft greige (gray-beige) – cost me a $25 can of paint. It brightens the room and makes the dark accents pop. Do not paint your bathroom navy or charcoal unless you have a huge window. You’ll hate it on a cloudy day. Trust me.
Also, consider the ceiling. I kept mine plain white. The light bounces off it. If I’d painted it black, the room would feel like a tiny box. Not the vibe.
Budget breakdown and alternatives if you don’t DIY
Let’s be real. Not everyone builds their own vanity or drills into tile. So here are the affordable store-bought options that still get the industrialbathroom look. IKEA has a black metal shelf unit called the VESKEN for like $15. Good for toiletries. Wayfair has a matte black faucet under $40. A floating walnut-finish vanity from Home Depot runs around $200 – it’s not real walnut, but a good laminate can pass if you’re not touching it everyday. If you can’t paint, just swap the mirror and hardware. That alone changes the entire feel.
One thing I splurged on: a good quality mirror. I got a round black framed mirror from a secondhand furniture shop for $20. It had a small scratch on the edge – I covered it with a piece of black washi tape. No one notices. You don’t need a perfect mirror. You need a mirror that fits the style. Round vs square is a personal choice. I went round because everything else in the room is rectangular, so it breaks up the lines.
Real before and after: what made the biggest difference
If I had to rank the changes by impact: number one is that walnut vanity. The moment it went in, the room had soul. Number two is the black pipe shelving. It gives height and structure. Number three is the matte black faucet – sounds small but it’s the thing you touch every single use. It grounds the look. The lighting is four, and the towel bar is five. Honestly, I could have skipped the towel bar and used a hook, and it would still feel like a hotel. The small hook for the hand towel cost me $3.00 off the clearance rack. It’s a black metal S-hook that loops over the shelf edge. Totally free if you have a clamp-on hook.
And that’s it. This makeover cost me about $350 total if you count paint, hardware, and misc supplies. If I’d hired a contractor, it’d be two grand minimum. But because I did the work myself and hunted for deals, I ended up with a bathroom that feels custom, raw, and absolutely nothing like the beige box I started with.
Now every time I walk in, I get that little hit of satisfaction. It’s not perfect. The grout in the corner is a little crooked. But you know what? Hotel bathrooms aren’t perfect either. They just look good in pictures. So does this one.
Ready to give your own bathroom that industrial edge? Start with the hardware swap and a can of paint. Then come back and tell me how it goes. I’d love to hear your version of metal and wood.
#industrialbathroom #bathroommakeover #metalwoodstyle #bathroomideas #bathroomreno
Leave a Comment