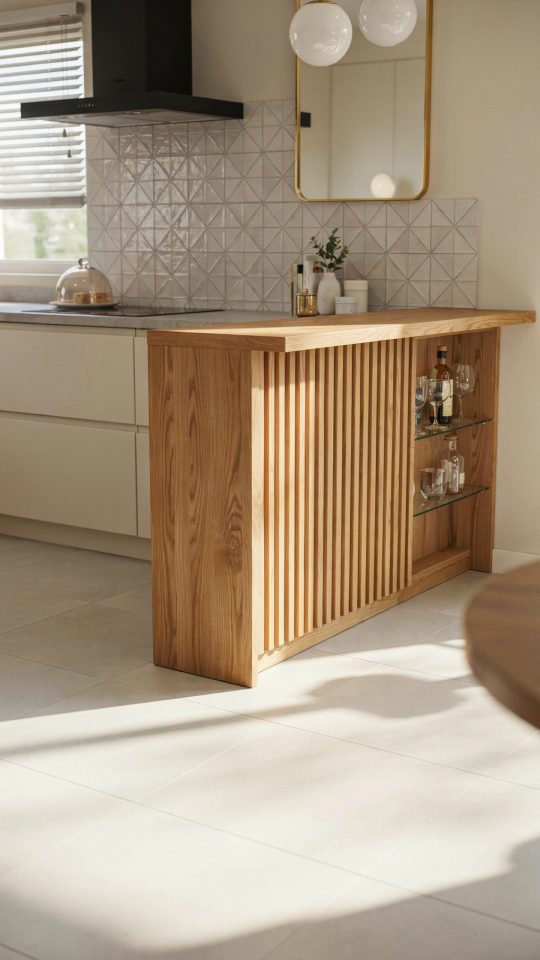
You walk into your bathroom and see a wall of warm wood paneling. Nothing special, just a clean surface. But what if that wall hid a full cabinet for towels, toiletries, and even your hair dryer? That is exactly what a camouflaged wood panel bathroom cabinet can do. It turns an ordinary wall into smart hidden storage without cluttering your space. I have lived in a tiny apartment with a bathroom the size of a closet, and this trick saved my sanity. Here is how you can plan, build, and style one yourself.
Why a hidden wood panel cabinet works for small modern bathrooms
Small bathrooms force you to make tough choices. You want a clean, airy look, but you also need somewhere to put your shampoo and extra rolls of toilet paper. A freestanding cabinet or a bulky medicine chest can break the visual flow. A modern bathroom design thrives on minimal lines and unbroken surfaces. A hidden cabinet behind a wood panel keeps that illusion intact.
When I first saw a camouflaged cabinet in a friend’s guest bathroom, I thought the wall was solid. She opened a small flush door, and inside were neatly stacked washcloths and a first aid kit. It felt like magic. That moment made me realize how much wasted space we overlook. A wall that looks finished can actually be a door to storage that is both practical and invisible.
This approach works especially well in bathrooms where every inch counts. You can use the space between studs, a recessed nook, or even a shallow bump out. The best part is that you do not have to sacrifice style for function. The wood panel ties the whole room together, especially if you match it to existing paneling or wainscoting.
How to choose the right wood panel for a seamless camouflage
The key to a believable hidden cabinet is the panel itself. You want it to look like the rest of the wall, not like a door with a giant gap. Start by selecting a woodpanel that matches the direction, grain pattern, and color of your existing surface. If you are starting from scratch, pick a style that fits the room design.
Here are the most common wood panel options for this project:
- Tongue and groove planks – great for a cottage or farmhouse look, and the seams help hide the cabinet door edges.
- Shiplap – modern and clean, with horizontal lines that make the door less obvious.
- Plywood sheets with a veneer – best for a sleek, minimalist look. You can cut a single sheet to cover the cabinet door and the surrounding wall, so the grain flows continuously.
- Reclaimed wood planks – if you want a rustic vibe, but be ready for uneven surfaces that might make the door harder to open smoothly.
Whichever you choose, buy extra material. You need enough for the wall surface plus the cabinet door itself. And do not forget to treat the wood with a waterproof sealant. Bathrooms have humidity, and raw wood can warp or grow mold if it is not protected.
Measuring and planning your hidden bathroom cabinet location
Before you cut anything, take a hard look at your wall. Is there an electrical outlet, a pipe, or a stud in the way? You want to place the cabinet where it will be most useful without interfering with anything behind the wall. I learned this the hard way when I tried to install a shallow cabinet only to find a copper pipe right where the shelf needed to go.
Standard wall studs are 16 inches apart on center. That gives you a space roughly 14.5 inches wide between two studs. That is plenty for a smallbathroomideas style cabinet. If you want something wider, you will need to cut out part of a stud and add a header, which is a bigger job. For most people, keeping the cabinet between two studs is the simplest route.
Measure the depth you need. A typical bathroom cabinet is 4 to 6 inches deep. That fits smaller bottles and folded towels. If you want to store full size shampoo bottles, go for 7 to 8 inches. Just remember that deeper cabinets stick out more from the wall, making the camouflage harder to pull off. A shallow recessed cabinet looks more like part of the wall.
Also consider the height. A cabinet that runs from the floor to the ceiling gives you maximum storage, but it is also a big door to disguise. A shorter cabinet at eye level can blend into a wainscoting panel. I prefer the latter because it leaves the upper wall clear for a mirror or decor.
Step by step installation of a hidden panel cabinet
Now comes the hands on part. I will walk you through the basic process. This assumes you have some DIY experience or are willing to hire a carpenter for the rough work. If you are a renter, check with your landlord first or consider a freestanding version that leans against the wall.
Tools you will need:
- Stud finder, pencil, tape measure
- Drywall saw or oscillating tool
- Wood for the cabinet box (plywood works well)
- Screws, wood glue, shims, level
- Finish nails and a nail gun
- Panel material for the door and surrounding wall
- Hidden hinges (I recommend soft close ones)
- Sealer or paint
Start by locating the studs and marking the opening. Cut the drywall carefully so you can patch it later if needed. Build the cabinet box inside the cavity, making sure it is square and level. Screw it into the studs on each side. The front edge of the box should be flush with the drywall surface.
Next, cut the panel material for the door. Make it slightly smaller than the opening so it does not rub. Attach your hidden hinges to the door and then to the cabinet box. These hinges mount on the inside, so you see nothing from the front. Test the door swing. It should open smoothly without catching.
Finally, install the paneling on the surrounding wall. If you are using individual planks, apply them up to the edge of the door. A small gap (1/8 inch) around the door is normal, but you can cover it with a thin trim piece painted to match. Some people use magnetic catches to keep the door shut tight. Others prefer a push to open mechanism that does not need a handle.
Styling your hidden cabinet for a modern bathroom look
Once the installation is done, you get to the fun part: making it useful and beautiful. The whole point of a bathroomcabinet that hides behind wood is that you do not see clutter. So keep the inside organized. Use small baskets, clear containers, or drawer dividers to group items.
Think about what you use most often. I keep my daily toothbrush, toothpaste, and face wash on a shallow shelf near the top. Towels go on a lower shelf. Extra toilet paper and cleaning supplies sit on the bottom. That way I only open the cabinet when I really need to restock, and most of the time the wall stays clean.
If your cabinet has a mirror on the inside of the door, that adds function without breaking the camouflage. You can also mount a small hook inside for a hand towel. For a modernbathroom look, avoid overstuffing. Leave some empty space so the door closes easily and the interior does not look like a junk drawer.
One tip from my own experience: use a tension rod inside a deep cabinet to hang spray bottles upside down. That keeps the nozzles clean and saves shelf space. It is one of those small tricks that makes a hidden storage cabinet work harder for you.
Products and items to store in a camouflaged wood panel cabinet
Not everything belongs in a hidden cabinet. Since it is not visible from the outside, you can store items that are practical but not pretty. Here is a list of things I recommend for this kind of hiddenstorage:
- Extra toilet paper rolls (buy in bulk and store flat)
- Cleaning supplies like spray bottles and microfiber cloths
- First aid kit and medications
- Hair styling tools (blow dryer, straightener) if you have an outlet nearby
- Backup toiletries (shampoo, body wash, lotion)
- Towels and washcloths (fold them narrow to fit shallow shelves)
- Small trash bags or liners
What should stay out? Items you reach for every day, like hand soap or a toothbrush, are better left on the counter or in an open caddy. Opening a hidden door every time you wash your hands gets old fast. Reserve this cabinet for the stuff you want hidden but not urgently needed.
Maintenance tips for wood panel cabinets in a humid bathroom
A wood panel cabinet in a bathroom has to handle moisture. Even with a sealant, the humidity can cause the wood to expand and make the door stick. I have a few practical habits that keep mine working well.
First, run the exhaust fan during and after showers. That reduces the overall humidity. If you do not have a fan, crack a window or use a dehumidifier. Second, check the sealant once a year. A fresh coat of polyurethane or marine varnish every 12 months will protect the paneling. Third, wipe down the inside of the cabinet if you see condensation. A dry cloth once a week prevents mildew from forming behind the door.
If the door starts to stick in summer, you can sand the edge slightly. Do not overdo it, just take off a millimeter or two. The wood will shrink back in winter. I had to do that on my first cabinet, and it fixed the problem completely.
Lastly, keep the hinges lubricated. A tiny spray of silicone lubricant on the pivot points keeps them from squeaking. Hidden hinges are great for looks, but they can get stiff if you do not give them any attention.
Putting together a camouflaged wood panel bathroom cabinet is one of my favorite DIY projects. It solves a real problem, it looks clean, and it makes people smile when they discover the secret behind the wall. If you have a small bathroom that needs more storage without more visual noise, this is a solid solution.
Try sketching out your own wall and see where a hidden cabinet could fit. Even if you start with a single small door, you will be amazed at how much junk you can tuck away. And when guests ask where you keep everything, you can just smile and say, look at the wall.
#hiddenstorage #bathroomcabinet #modernbathroom #woodpanel #smallbathroomideas
Leave a Comment